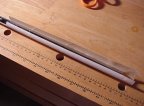
Regripping
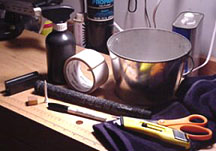
| What's Needed? | ||
| new grip | shaft protector | paint tray |
| 2" 2-sided tape | scissors | golf tee |
| utility knife | mineral spirits | permanent marker |
| vise | cloth rag |
Step-by-Step Procedure
The following procedure is for round rubber slip-on grips only. This represents one approach to regripping clubs based upon experience through trial and error. Many variations to this procedure exist depending upon grips used, desired outcome, and personal preference.
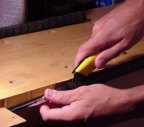
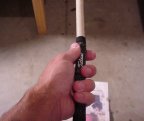
1. REMOVE EXISTING GRIP
It is best to secure the club using a rubber shaft protector and a vise. The club should be clamped in a horizontal position. Next, using a utility knife with a hooked blade, cut the grip using a firm steady motion. A hooked blade is recommended because it will not cut into the shaft. This is especially key when regripping clubs with graphite shafts.
Safety Note: Remember to always cut away from your body to prevent injury.
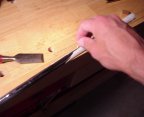
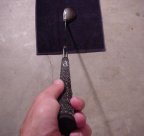
2. CLEAN SHAFT
Peel or scrape old tape from shaft. This may require an object with a stiff edge. Depending on how long the grip has been on the club, it may peel off using your fingers. A paint scraper will work on a steel shaft but should not be used on graphite shafts. Graphite shafts require a scraper with a hard plastic edge. Once the old tape is removed, apply mineral spirits to a clean rag and wipe away tape residue.
Safety Note: Remember, when using mineral spirits or similar products, ensure that the work area is properly ventilated.
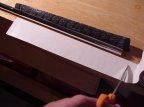
3. APPLY 2-SIDED TAPE
Place the new grip next to the shaft with the end of the grip lined up with the end of the shaft. Using a permanent marker place a mark on the shaft approximately 1/2" toward the butt end of the shaft. Measure the length of 2-sided tape needed by starting the tape on the mark made earlier and extending the tape approximately 1" beyond the butt end of the shaft. Cut the tape using scissors. Apply tape to shaft by placing the tape lined up with mark and shaft in center of the tape. Wrap tape around the shaft vertically one side at a time. Tape will overlap slightly. Leave tape backing on at this point.
Procedure Note: This procedure uses 2" 2-sided tape. 1" 2-sided tape can also be used. A single strip could be used and overlap the shaft or a strip placed in a spiral manner on the shaft could also be used.
4. INSTALL NEW GRIP
Secure the club in the vise. Remove tape backing. Insert a golf tee into the hole in the end of the grip. Pour mineral spirits into the grip until it is approximately half full. Place an index finger over the opening of the grip and shake up the grip up and down to spread the mineral spirits over the inside of the grip. Place the paint tray under the club. Pour contents of the grip onto the exposed tape thoroughly. Next, pinch the opening of the grip between your thumb and index finger. Place the grip opening over the butt end of the shaft and slide grip in place ensuring that the shaft is inserted into the grip completely.
5. ALIGN GRIP
It is important to align the grip properly. Most grips are designed with alignment aids on both ends of the grip. These should be aligned on the shaft and in line with the club's face angle.
Step 1 - Remove Existing Grip
Step 2 - Clean Shaft
Step 3 - Apply 2 Sided Tape
Step 4 - Install New Grip
Step 5 - Align Grip
|